
Upgrade the Midronome Bootloader
The bootloader is the part of the firmware which takes care of updating the main firmware. This page is for Midronome devices only, with firmware 3.0 and earlier.
All Sim'n Tonic devices now use a new bootloader, much smarter and much faster, and your device needs to upgrade its bootloader for any future firmware updates.
Step 1 - Upgrade bootloader
The first step is to upgrade the actual bootloader, which will erase your current firmware. Download and run the "Upgrade Midronome Bootloader Step 1" program, and when the program asks for a file, give it the "upgrade-bootloader.midr" file.
| Mac OS | Windows |
| Download | Download |
Run the "Upgrade Midronome Bootloader Step 1" program, follow the instructions on the screen, and when the program asks for a file, give it the "upgrade-bootloader-v99.9.midr" file.
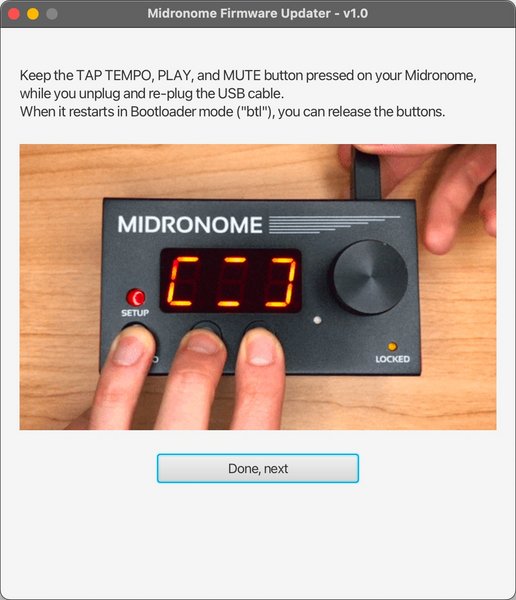
(the FW version shown on the device will be "99.9" - this is normal)
Note: if it cannot find your Midronome, try closing all applications using MIDI and restarting the program.
Important! The old bootloader:
- does not work with macOS Sequoia and newer
- does not work either with Windows 11 with the new MIDI 2.0 Services (update from March 2026)
If you are in those cases, unfortunately the only way forward is to find another computer (or to roll back the new MIDI updates on Windows * )
There is nothing we can do to solve this, as the bootloader needs to run once to update itself. Please note that:
- Step 1 only requires a USB port and takes a few minutes - it can easily be done on a borrowed or public computer
- This is an issue for step 1 only - the new bootloader works perfectly fine with any Mac or Windows
Step 2 - Load the newest firmware
At the end of Step 1 your device will show "UPG" with a green light, that means the upgrade was successful and you have the new bootloader.

(if the LED is not green, check your USB connection to the computer)
You should now be able to do a normal firmware update using the FW Update Tool from the Support page.
Any issues?
If you have any issues or questions during the process, do not hesitate to reach out! You can see the different ways to contact us at the bottom of the Support page.
* Step 1 on Windows 11
Some of our users managed to successfully perform step 1 on a Windows 11 machine by disabling all MIDI 2.0 Services and then re-enabling them afterwards. The following instructions are given without any guarantee, follow them at your own risk!
- Close all MIDI software (DAW, Overbridge, etc.) and unplug the Midronome.
- Open Registry Editor as administrator (Start > search "regedit" > Run as administrator).
- Go to: Computer\HKEY_LOCAL_MACHINE\SOFTWARE\Microsoft\Windows NT\CurrentVersion\Drivers32
- Right-click in the right pane > New > DWORD (32-bit) Value. Name: UseLegacyMidi
- Double-click it, keep Base = Hexadecimal, set Value data to 1, click OK.
- Restart the PC (the change only applies after a restart).
- Start "Upgrade Midronome Bootloader Step 1" and follow the steps
- Once the Midronome's display shows "UPG" with a green light, you have performed Step 1 successfully!
- Now roll back the MIDI Services: set UseLegacyMidi back to 0 (or delete it) and restart to return to the default Windows MIDI mode.